Quick Start Guide Configuring Luminex LumiNode 4 DIN for Color Kinetics luminaires
This procedure requires the separate purchase of a Luminex LumiNode 4 DIN RJ45 (Signify 12NC part number 913701059003). Start by following the installation procedures outlined in the LumiNode User Ma…
This procedure requires the separate purchase of a Luminex LumiNode 4 DIN RJ45
(Signify 12NC part number 913701059003)
(Signify 12NC part number 913701059003)
- Start by following the installation procedures outlined in the LumiNode User Manual to install and connect your LumiNode 4 DIN.
- Configure your computer using the typical Color Kinetics IP network address (10.x.x.x) and connect to the lighting network.
- Open a web browser.
- Enter the IP address of the LumiNode to be configured.
- Enter default credentials as:
username: admin
password: 1972

To load a new profile go to step 9.
Manual configuration
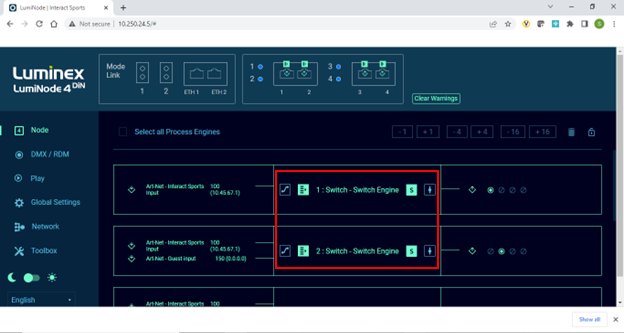
- Once logged in you will configure the outputs needed. There are 4 outputs available.
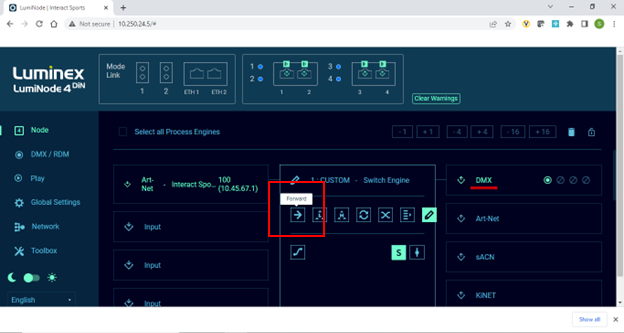
- On the output to be configured left-click on the middle box for switch engine and select Forward and SAVE.
- Confirm DMX is showing in the right column.
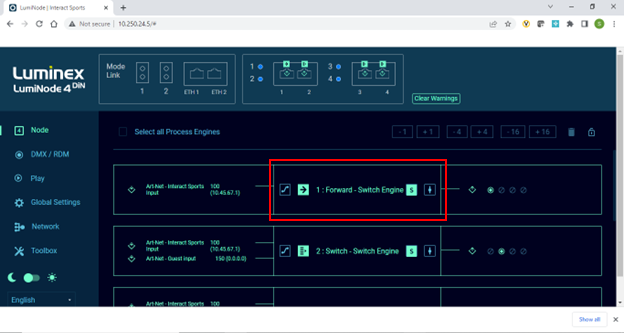
- Now left-click on the left box for the Input.
- Once that opens uncheck the box for ArtNet.
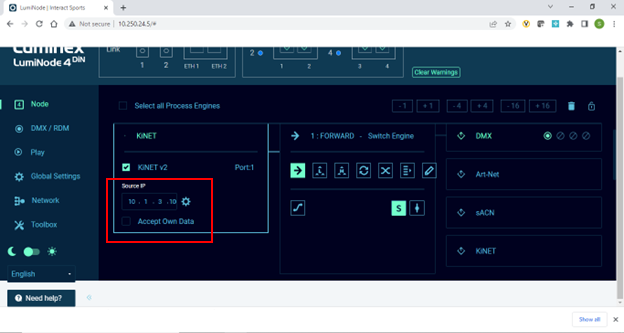
- This will show a list of new inputs and select KiNET v2.
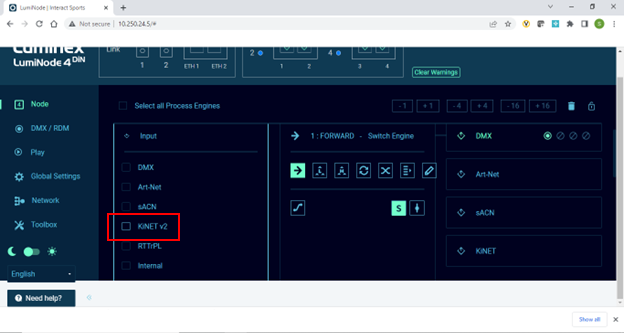
- Once KiNET v2 is selected you must enter the IP address of the controller being used. For this example, we are using 10.1.3.100 for the Light System Engine (LSE).
- Select the advanced wheel, and uncheck the box for Accept Own Data.
- Select SAVE.
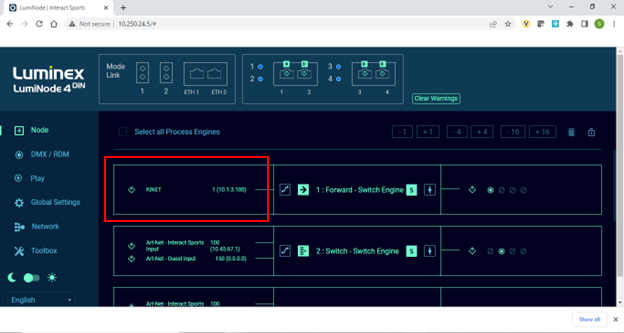
- Now the input is set to KiNET, and output is set to DMX.
Repeat this for any other outputs used.
Loading a new profile
- Go to TOOLBOX.
- Select Import and go to your file.
Download an example file here. For this example we are using a configuration for all 4 ports on Light System Engine (LSE).

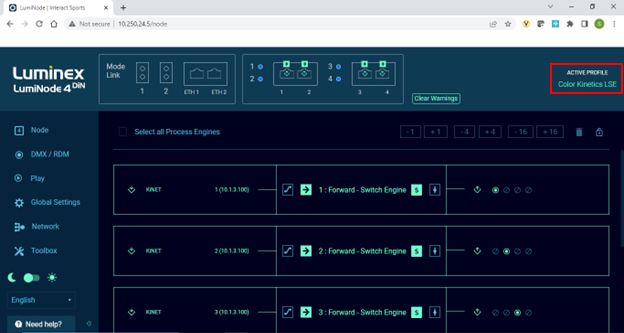
- Once the file is imported you will see Color Kinetics LSE listed in the profile.
- Select Recall to make it the active profile.
For additional Luminex LumiNode 4 DIN information refer to:
Color Kinetics webpage: www.colorkinetics.com/global/products/controllers/luminex-luminode-4din
How Did We Do?
Updating Multi Protocol Converter 8 Firmware with QuickPlay Pro 2