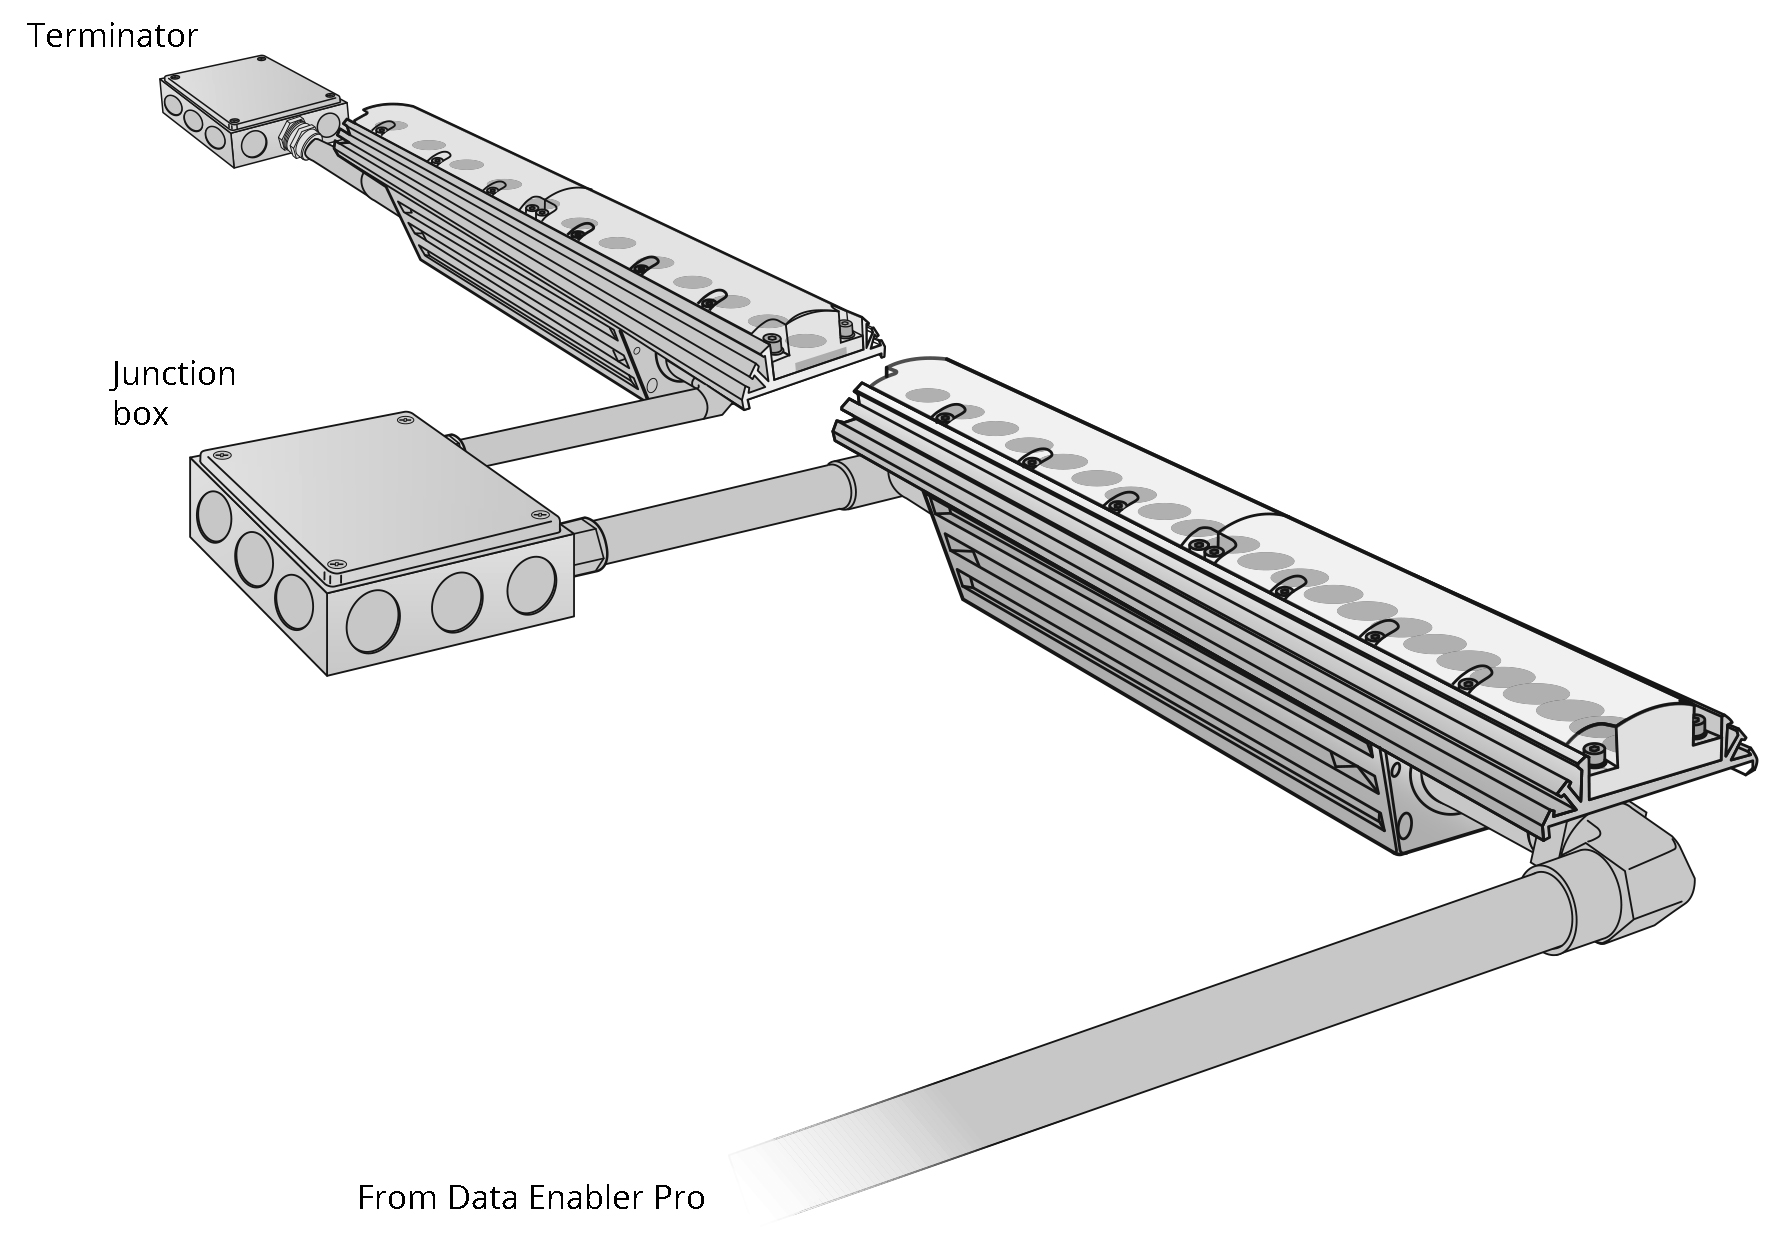
Graze Powercore Conduit Installation
Custom Configuration Graze Powercore Conduit luminaires have threaded openings on each end appropriate for junction box connections. The threaded openings accept 1/2 in NPT conduit and includes 1.8 m (6 ft) flying leads.

Custom Configuration Graze Powercore Conduit luminaires have threaded openings on each end appropriate for junction box connections. The threaded openings accept 1/2 in NPT conduit and includes 1.8 m (6 ft) flying leads.
If installing luminaires in series, run 1/2 in NPT conduit and wire of the correct gauge and wire count from the Data Enabler Pro to the first luminaire. Refer to the Graze Powercore and Data Enabler Pro Installation Instructions for specific mounting and wiring instructions.
To make connections between luminaires run the conduit and flying leads from the output end of one luminaire and input end of the next luminaire in the series into a junction box. Connect wires according to the Installation Instructions.

If installing luminaires in parallel, run 1/2 in NPT conduit and wire from Data Enabler Pro to a common junction box. Run the conduit and flying leads from the first luminaire in each series to the common junction box and connect wires according to the Installation Instructions.
Terminate the run by running 1/2 in NPT conduit and the flying leads from the output end of the last Graze Powercore Conduit luminaire to a junction box and terminate each wire.
Secure all junction box covers. For wet or damp locations, seal all points of entry to prevent water infiltration. Use RTV Silicone, and weatherproof junction boxes.
How Did We Do?
Custom Content Quick Start Guide - Luminous Textile
